Pigeon Pose · Full Anatomical Analysis + Mistakes to Avoid
This video include some common mistakes and possible solutions For more info on this pose, check our Yoga app at the link ...
Transcript
pigeon pose ekapata rajakapatasana [Music] the pigeon pose is one of the most popular yoga poses and it helps release tension points and improve the range of motion in the hip joints this pose requires particularly high mobility in the hip joint practitioners with a suitable natural structure and unusual flexibility can do it relatively easily still in most cases the hip joint structure does not allow the femur to use the entire rotation range and creates a break unsuitable or too aggressive practice can cause severe damage to the knee joint as will be presented in the kinesiological analysis of this pose the correct way to perform the pigeon pose step by step start on all fours and bring one leg forward with the knee between your hands the front knee is bent in the sagittal plane take the foot away from the thigh to open the knee angle while keeping the pelvis centered notice how it creates rotation in the hip and knee joints the back leg is straight in plantar flexion make sure to maintain the pelvis in the center inhale in this position while the chest faces forward and upward turning the sternum flashlight around the hands are placed on the floor to the sides of the knee inhale with the chest facing forward and upward the center of the chest bone faces forward exhale and descend slightly with the pelvis in the center without collapsing to one side after a few breaths slide the hands forward on the floor and rest your forehead between the hands or on the palms the movement in the hip integrates flexion and external rotation pay attention to the tension created in the lateral band of the ilia femoral ligament y ligament the stretched muscles are gluteus medius piriformis gluteus minimus gluteus maximus during elevation and thoracic extension the back erectors contract and the iliopsoas muscles of the back leg are stretched here's one common problem when performing this pose increased rotation in the front knee joint resulting from limited external rotation in the hip joint the reason for that could be shortened internal rotators or limited mobility in the ligaments around the hip joint with an emphasis on the lateral portion practitioners with a suitable natural structure and high flexibility in the hip joints can perform the full pose relatively easily as their thighs can rotate outward fully for many practitioners the hip joint structure disables the femur's range of rotation and a chain reaction of excessively strong rotation is created in the knee if the student or teacher forcefully pushes the body down the tibia and femur will serve as two levers creating large rotational force on the knee therefore there is an actual risk of knee injury when a combination of three components is created at the same time a flexion b rotation c load this combination is exactly the danger of the pigeon pose if it is performed incorrectly the practitioner should feel the stretch only in the hip joint if the stretch moves to the knee you should exit the pose immediately but carefully pressing the legs while applying force into the position is one of the most dangerous things in the pigeon pose and can lead to severe injury in the supporting ligaments of the knee joints never force or pressure a student to perform or stay in this position if they feel tenderness or pain in the knee joint in any case of knee pain do not perform this pose at all a possible solution for this problem each practitioner has a different range of motion in the hip joint and the pose needs to be adapted personally according to this range there are a few possible solutions in case of knee pain in the pigeon pose a reduce the angle between the knee and thigh to avoid rotation as the angle increases so does rotation in the knee b choose an alternative exercise to improve flexibility and mobility of the hip joint the following is a recommended variation using the wall to improve flexibility and mobility of the hip joint the following is a recommended variation using the wall to improve hip rotator flexibility c in any case of limited lateral rotation in the hip or sensitivity in the knee use adaptations to maintain a balanced position of the pelvis for example sitting on a block or a bolster to create elevation on one side of the pelvis d when the pigeon pose is performed fully the front ankle should be in dorsiflexion however if the thigh rotation is limited and there is still pressure on the knee it is essential to keep the knee joint in the sagittal plane and the ankle in plantar flexion in this position even though the knee is bent the dorsiflexion in the ankle creates rotation and a risk to the knee although the knee is in flexion in this position the ankle is in dorsiflexion causing rotation and endangering the knee in this position it is best to keep the angle in plantar flexion plantar flexion in the ankle is more suitable as it decreases rotation in the knee joint and reduces the risk of injury the second problem in this exercise is sensitivity or pain in the lower back as a result of strong arching increased lumbar lordosis the higher the arms and the closer to the knee the deeper the arch in the lower back in cases of tenderness in the lower back lordosis etc it is advised to move the palms forward slightly to reduce the degree of lumbar lordosis additional adaptations laying the forehead on a block with hand support in this condition lumbar lordosis is eliminated [Music]
More practice
 Half Standing Forward Bend (Ardha Uttanasana) - Yoga Pose Tutorial by Muscle and MotionMuscle and Motion · 3:29
 Warrior I (Virabhadrasana I) - Yoga Pose Tutorial by Muscle and MotionMuscle and Motion · 1:40
 7 Common Bathing Mistakes You Must Avoid · Cleanse Your Body and Mind · Shower & Hygiene RoutineThe Yoga Institute
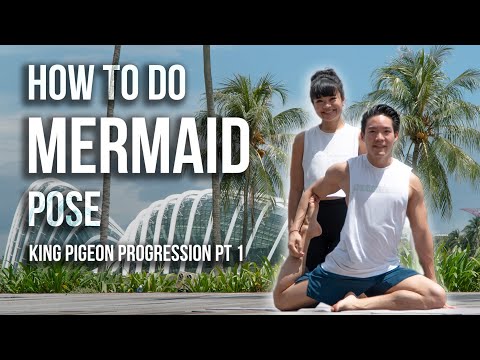 How To Do Mermaid Pose · Yoga Progression to King Pigeon Pt 1Conscious Advances