Align Refine: Yoga Pose Tutorials - Ankle to Knee
Practice summary
- Video length
- 9:25
This video will give you many variations on a yoga pose called Ankle to Knee (or some of you may know it as Firelog). However, which ever name you call it, it can be quite challenging to come into the full expression of this pose if your hips are tight. Here you will find options for the beginner to advanced practitioner. Always something offered for everyone!!
Transcript
hey everyone how you doing today so i'm going to show you a few options for ankle to knee some of you who have been practicing yoga for a while may know it as fire log pose i'm old school i learned it as uh ankle to knee so that's what i'll be calling it anyway all you need is a yoga blanket or perhaps a towel something you can you can sit up on if you need a little bit of lift if you find that your knees are higher than your hips you'll want to set up on the blanket so that you have your hips higher than the knees is that just a more comfortable way to do it plus the alignment is better and you'll need one block or a thick book or again another rolled up blanket so that'll be one of the options i'm not going to use the blanket um to show you uh throw off my alignment but please do sit on it and you would just pretty much sit on the edge of it just so you get a little bit of lift from the hips there um in the hips i should say so okay so first option you want to start with the legs extended okay um all different ways we can do this so start with the a place if you're tight this will feel pretty comfortable and also protect the knees we always want to protect the knees and hip opening because if the hips are tight it'll always go to the weaker place with more mobility the knee so you always want to be careful of that so let's start with the right foot i'll place the right foot flat on the mat and the knee is up toward the ceiling what you want to do here is just cross the right shin over the left thigh above the knee so never on the knee this might be enough and from here you can just fold forward and yes you'll get a hamstring stretch you'll get you'll stretch the back of the left leg but also you'll feel it in the right hip if you're if you're a little tight in the hips there next stage would be to place the left foot onto the mat with the knee up toward the ceiling hands behind your back now the tendency here is to start to round you don't want to do that you want to lift the center of your chest away from the navel get nice and tall and then you want to walk your heel and your seat as close as they'll go so some of you might be really close to the chest pressing toward the shin some of you may be a little further away and this can be pretty intense so you play around with the right amount of sensation feel another thing that happens is the shoulders keep up to the ears so you want to roll them down the back towards your hips so you have a little more space between neck between the ears and the shoulder long through the sides of your neck so you can be here now next stage would be to heel toe the left foot over toward the right just to check it out and maybe you're stacking the right shin on top of the left so it's an easy transition to go there this might not be appropriate for you how you'll know if it's not appropriate is if your foot is looking up at you rather than facing toward the side wall so if it's flex and facing toward the side wall good if it's looking up at you you're pulling on the outer part of your ankle setting yourself up for an ankle injury you don't want that you want the foot nice and flush toward that wall even if you have to bring your maybe you bring your ankle forward of your knee if that's appropriate and it may be like this so if you have a block blanket you can put that over here if you wanted so you want to put that here to save a place for it to rest that's fine again a blanket can work as well if you find that that's just not working here's where the block comes in so what you want to do is you want to also make this a little bit deeper if possible you keep your bottom shin parallel to the front of your mat and then the top chin will be parallel to the bottom shin this would be your full expression let me show you the other one first so you place the block in front of the left knee and let the right foot just rest on top of that block so you still have the same shape but now you'll be you'll be no longer compromising the ankle and your knee will feel a lot happier if you would tighten your hip hands behind the back lengthen once again start them away from navel get really long not because the shoulders are creeping up to the ears but because the side body is getting really long and then you fold forward again the hands can stay behind your back or they can come forward of your shin chin to throat then once you've extended your spine we always want to find extension first in whatever pose we're doing then we bring the chin toward the throat and we surrender here you can hold here for a little bit stay here if this feels if this feels right for you again coming back to the full expression without the block we just have the shins stacked parallel to the front of the mat hands either behind the back or forward of the leg same thing start away from navel get long through your spine long through the side body and then chin to throat soften between the shoulder blades and just let everything go here and then bring yourself back up by walking your hands in towards your body and the way you'd come out wherever you were at would be to extend the leg straight out in front of you and shake it up all right i'm gonna go through that one more time on the other side a little quicker so you can see it again all right so now we place the left foot flat on the mat cross it over to the top of the right thigh above the knee foot is flexed so you can already get an idea of what that looks like right foot on the mat you can start to walk the seat and the heel close to one another keep your chest nice and long uh it's nice and extended i should say better word for that stay right here or we heel toe the left side the right foot over to the left stacking left shin on top of right shin that doesn't work for you like i said block book whatever you have that you can place the left foot on hand behind the back you fold forward or you bring the hands in front of the shin chin to throat soften the shoulder blades and just surrender here either here or again stacking the shins one on top of the other if appropriate for you again hands behind the back or hands forward and we surrender here so this is the seated version i know i didn't hold you here long as i wanted to teach this to you could always go back over these alignments and then hold it as long as you can you really want to be able to get into the hips and it's very important to breathe into it so the more you breathe into it you'll start to see your body relax you'll start to see that gravity will assist you in going deeper so that's really what you want to go for you're not pulling your way in you don't want to force your way in just let the body gradually move into it if this any of these seated positions is just not working for you there is always the recline version and that would look like this you're lying flat on your back we'll cross the right shin over the left again it's not on the knee it's like a figure four first stage take your right hand on the right inner thigh never the knee right we press on the inner thigh and we just let it move away from us and that would be a really great hip opener if you can lift the left foot off the floor and interlace so right hand between that little little figure for the triangle between the legs behind the left thigh and the left hand can interlace there behind the left thigh without this happening not the head of the shoulders reaching and you're all crunched up in your chest then you can do this if you have a yoga strap or a belt you can do that and you can just hold it like this with the strap around the back of your leg forgot to bring my strap over but i'm sure you can get an idea of what that would look like but again it's not going to be pulling it's always going to be the shoulders flush against the mat so he will be here and again if it doesn't work for you you can always be here all right other side bring the left shin over the right thigh either just pressing the left inner thigh away with the left hand or lifting up through the right leg left hand between that little figure four between the triangle interlace both hands behind the right thigh and as you draw the in this case the right leg in towards you use your left elbow on the left inner thigh to deepen a little bit not like again you're not trying to compromise the shoulders of the neck to open the hip so very gently you're pressing on it but you don't want to be making so much pressure that you tense up in the upper body it should be very easeful so this is how we would go into a hip opening if we were going to do it reclined so i hope that was helpful for you just give that a try so practice along with this video and then see if you can do it on your own and hold it a little bit longer that would be a really great way to open the hips and just feel a little bit better throughout the day our hips are so tight from all the sitting that we do so nice way to just get a little more space so again hope that was helpful and see you again soon namaste you
More practice
 Bridge Pose IN Yoga: with proper alignmentYYOGA at Home — yoga classes + tutorials · 7:25
 How to do Dancer's Pose (Correctly — and with stability!)YYOGA at Home — yoga classes + tutorials · 3:07
 How to do Janu Sirsasana - Head to Knee Pose - Yoga Tutorial, Modifications, plus Tips & TricksDi Hickman · 11:44
 How to do Janu Sirsasana - Head to Knee Pose · Forward Bending Yoga Pose · Step-by-Step GuideFlexifyMe · 1:35
 How to do Supta Virasana (Reclined Hero Pose) · Yoga tutorials for beginners · Yoga asanas · YogaYoga Fitness With Priyanka Sharma · 2:55
 Side Crow Pose - Parsva Bakasana - yoga tutorials by Amanda DeeAmanda Dee Yoga · 1:42
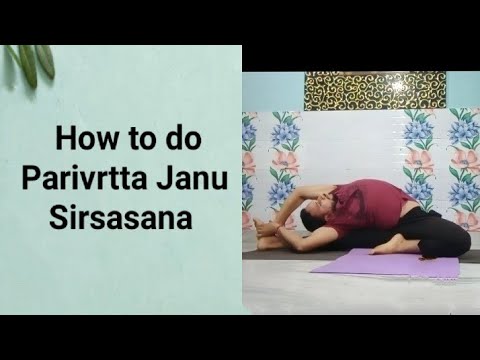 how to do Parivrtta Janu Sirsasana(revolved head to knee pose)nikk yoga studio · 4:09