Chapters
How to do Urdhva Mukha Svanasana · Upward Facing Dog in Ashtanga Yoga
Practice summary
- Level
- all levels
- Video length
- 8:39
- Equipment
- Energy
- balancing
- Target areas
In this practice
Key teachings
- Practicing Upward Facing Dog safely and effectively within Ashtanga Yoga
- Understanding traditional vinyasa cues and alignment principles for injury prevention
- Learning to interpret body sensations to deepen the pose and ensure proper engagement
- The importance of spinal traction and opening the front line of the body in backbends
- Applying Ashtanga's drishti (gazing point) for neck health
Ideal for
- Ashtanga yoga practitioners seeking to refine their Upward Facing Dog
- Beginners and all levels looking for detailed alignment instruction
- Individuals aiming to prevent injuries in backbends and shoulder joints
- Students wanting to deepen their understanding of foundational Ashtanga poses
Lesson
Instructions
Upward Facing Dog is one of the most practiced poses within the entire Ashtanga sequence, but do you know how to practice it safely?
In this tutorial, we’re discussing URDHVA MUKHA SVANASANA / UPWARD FACING DOG POSE, a foundational pose in Ashtanga Yoga. You’ll learn the traditional vinyasa cues as Jelena demonstrates how to move into this pose from Chaturunga Dandasana, with different ways to transition and the benefits of each. You’ll understand how to determine the distance between hands and feet to avoid compression, how to keep your legs straight and engaged, and how to properly rotate your arms to avoid injury risk. You’ll also learn what sensations to look for that help you know you’re on the right track to fully and deeply experiencing this pose.
WHAT SHOULD WE MAKE NEXT? 🎥 Want to see more tutorials like this? Want tips on a pose that you don't see in our library?
❗ Let us know in the comments and we'll make a video for it!
🔹 ASHTANGA TUTORIALS 🔹 Guidance on BREATH and ALIGNMENT 🔹 Tips to help you tap into a more YOGA-FOCUSED LIFESTYLE
Videos range from quick 5-10 minute lessons to longer, full-length led classes (for ALL levels of experience!) to help you begin, maintain, and/or deepen your Ashtanga practice.
JOIN OUR FREE COURSE 🧘♂️ Get *lifetime access to Meditation in Asana*, our FREE 7-lesson course that guides you in developing more self-awareness and connection in your practice. Sign up here →
WANT OUR YOGA MAT? SAVE 10% on any Liforme mat with our code: DAVIDANDJELENA →
WATCH THESE NEXT 💻 🔹 How to Keep Your Wrists Happy During Yoga | Alignment & Techniques to Help With Wrist Pain 🔹 How to do Chaturanga Dandasana | Four Limbed Staff Pose in Ashtanga Yoga 🔹 How to do Surya Namaskara A | Sun Salutation A in Ashtanga Yoga
DEEPEN YOUR PRACTICE WITH US 🙏 🔹 Ashtanga for Beginners → 🔹 Primary Series Intensive → 🔹 5 Days to Float → 🔹 All David & Jelena Yoga courses →
STUDY WITH US IN PERSON - WORKSHOP & RETREATS 🌎 🔹 View our entire schedule →
STAY CONNECTED 👋 🔹 David's Instagram: @davidrobsonyoga 🔹 Jelena's Instagram: @vesic_jelena
Benefits
- Avoids compression in the lower back, wrists, and shoulders
- Prevents neck pain, headaches, and dizziness associated with improper alignment
- Promotes a deeper and healthier experience of the Upward Facing Dog pose
- Activates deep core muscles and strengthens the pelvic floor
- Creates beneficial spinal traction and opens the front body
Transcript
[Music] hi i'm david hi i'm yelena and this is our tutorial on word mokashvanasana upward facing dog and we're going to go over the conditions which are like the rules of the posture along with some alignment cues that we think lead to a deeper pose but also healthier pose and by now maybe you've noticed that we have been posting regularly here on this platform so make sure to comment let us know what you want to see and okay let's dive in so how do we know what the distance of the feet to the hands should be in upward facing dog well it would come from chaturanga and that's the four limb staff pose where we jump back or step back to the push-up position from here we go into upward facing dog ideally we're just going to roll over the toes so from chaturanga dandasana we pull body through and forward and roll onto the tops of the feet but that can be pretty tricky so for a lot of people they might be flipping the feet and then coming up which gives them a little bit of extra space in the back bend or even sliding back on the toes and then lifting into upward facing dog what does that do well it creates more length between the feet and the wrists and that allows the stretch to be longer in the front body so it will help you to avoid compression in the back how do you know if you need to do it oh you'll know you'll feel a sharp pain in your lower back when you try to do the position wherever your feet are so you'll bring your feet a little further back regardless of how far back your feet come it doesn't really matter from your hands you want to make sure that your feet are hip width apart so again the same distance they were in chaturanga dandasana and that there's a line from the back of the leg down through the heel and the toe watch out for your ankles sickling or collapsing out to the side as it leads to you know kind of a collapse in the ankle and sort of generally bad alignment through the joint so we want to keep the tops of the feet pressing evenly down into the floor it's going to feel like your pinky toe wants to come down and that's going to keep a line right down through the top of the foot flat on the mat all right so your hands are about shoulder width apart and this is going to be really important about how you work with your arms and we have a bit of a rule for working the arms and upward facing dog when the arms are below the shoulder your shoulder is in an extended position then we teach that you want to internally rotate your upper arms and that's going to protract your scapula your scapula will come away from each other so internally rotate and then draw the shoulders back as the chest comes through you can see that yell in his arms are very active here and as she pulls back we end up with the shoulders directly over the wrist and that's going to support the wrist you're going to avoid compression this is a different position that might be more intuitively drawn to you know where you spin the arms out and push your upper body back sometimes we think oh it's a deeper bend if we're pushing the body towards the feet you know making a circle but actually that's probably going to contribute not only to back pain but also to some shoulder problems as well you don't really want to put that much stress on the front of the shoulder when you externally rotate the arm and pull back like that your rotator cuffs all the muscles that are trying to stabilize the arm and the shoulder joint are going to start to shout at you and you'll know so when we internally rotate we're kind of gluing the upper arm into the shoulder and then holding it to that position as we draw the arms back okay next thing that we want to talk about is the hips so when we're doing a back bend uh in this position we're in an anterior tilt nothing fancy anterior tilt just means that the front of the hips are dropping down towards the floor and you're creating an arch in your lower back and to avoid creating any extra compression in the lower back we don't want to squeeze the glutes together so you don't want to clench your bum and drive your hips down towards the floor try to release your bum a little bit relax the glutes let the legs do the work of extending the hips so when you can get your hamstrings and your thighs to engage then you can use them to open up the front of the hip so you press the tops of the feet down into the floor and try to get your hamstrings to work here at the backs of the legs and reach through the fronts of the thighs and then soften the bum and just let the front hips sink down towards the floor all right so the work of the action the legs pulling your hips back and the arms pulling your chest forward creates a kind of traction through the spine that gives you a really good feeling of stretch without that compression you get in the lower back in fact one of the ways you'll know that you're on the right path is you'll start to feel these deep sensations in the front of your body so if you were experiencing any compression in your lower back that should start to go away and then the sensation become more concentrated around your hips and even in your lower belly because back bend is about opening the front line of the body really yeah and um don't confuse the idea of sinking the hips towards the floor with sinking the belly try not to release your belly down so that would be a collapse in the lower back as well so even though the hips are sinking down towards the floor then you want to keep pulling your belly up away from the floor right that's that strong bunda contraction yeah the one way to think about it it's this magic spot sort of between your pubic bone and the belly button and it's quite low so this is the place where we want to keep coming back and finding that slight lift which again activates all the pelvic floor and all the muscles deep within us and then moves the stretch again to the more external front line of the body and probably the last thing we should mention is the head position in the neck so in ashtanga we're given drishti gazing points for each of the postures or vinyasa for this one we call it pancha the fifth vinyasa of the sun salutation the drishti is nasagra the tip of the nose and that's going to influence where you put your head so we don't want to look up at the ceiling and collapse the back of the head down towards the shoulders we want to contain a little bit more so that we keep a nice smooth even curve in the back of the neck and push the back bend more into the thoracic spine into the upper back so keeping the gaze down towards the tip of the nose will help to release the muscles at the back of the neck and it'll help you avoid any kind of neck pain or headaches one of the things that made a big difference for me was to really think about keeping the chin down as i go back and i actually look for the sensations in front of my neck so it feels like a little bit of a tension that means that the engagement here in the front is ensuring that i'm not just collapsing through the back of my neck but that i am creating that space in the back which then stops it from you know going into a tension headache or even dizziness in some instances so these are all sort of cues that will bring you deeper into the the pose that you're doing but they'll also prolong your practice they'll keep your body safe and healthy and let you do upward dogs for the rest of your life all right if you want more tips and tutorials then make sure to and if you liked this or there's anything you want to know let us know in the comments section there's more coming so stay tuned see you soon
More practice
 How To Do Adho Mukha Svanasana · Downward Facing Dog in Ashtanga YogaDavid and Jelena Yoga · 7:23
 How to do Ashtanga Yoga’s Janu Sirsasana A · Head to Knee Pose ADavid and Jelena Yoga · 7:33
 How to do Baddha Konasana · Bound Angle Pose in Ashtanga Yoga · Tips for Beginner Hip OpeningDavid and Jelena Yoga · 11:56
 How to do Marichyasana C · Sage Pose in Ashtanga YogaDavid and Jelena Yoga · 20:48
 How to do Pincha Mayurasana · Feather of the Peacock or Forearm Balance Pose in Ashtanga YogaDavid and Jelena Yoga · 18:38
 How to do Surya Namaskara B · Sun Salutation B in Ashtanga YogaDavid and Jelena Yoga · 12:26
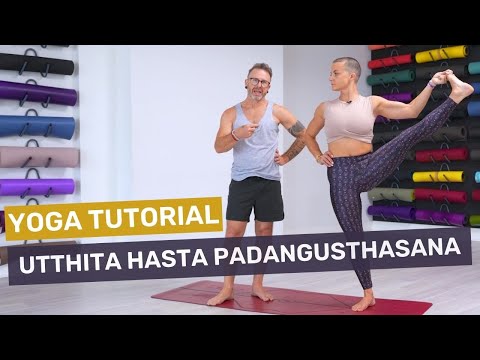 How to do Utthita Hasta Padangusthasana · Extended Hand to Big Toe Pose in Ashtanga YogaDavid and Jelena Yoga · 11:43