Go at your own pace and stop if anything hurts. If you are pregnant, injured or managing a health condition, check with your doctor or other healthcare provider before you try this practice.
LEARN How to do Parivrtta Parsvakonasana (Revolved Side Angle Pose) properly. Know the benefits and contraindications from Indian Yogi Ritesh.
namaste friends I am Ritesh and today our topic is revolved side angle pose also known as Parivrtta Parsvakonasana friends it's a complex pose which challenges your balance and flexibility in the hamstrings in the hips in the spine in the shoulders and neck friends it is very important in this pose to keep your heel on the floor if you are focusing on a classical pose so we will be doing different variations for different type of people to get understand how we can do it so friends it's an intermediate level standing forward bend and at the same time it's a deep detoxifying twist friends if we have any injury at the back at the spine at the shoulder please avoid it and especially if you have any injury in the neck region because we are twisting so just be careful or it's always better to have a guidance of a professional yoga teacher or a medical supervisor friends let's get into the pose but before we get into the pose don't forget to add some of the warm-ups or some of the preparatory poses so side angle pose would be great or low lunge or a high lunge or something like a tree pose or a Prasaritta that is a wide leg forward bend would be great or a side angle pose because a side angle pose depicts the same so now when you are focusing on a basically getting into the revolved side angle pose let's first cut down into two steps first is the foundation and the second is the twist where the palm comes where the twisting happens lot of things to understand so let's get into the pose so friends there are two variations to get into the pose let's get into the first one okay so I stand in Tadasana I tall myself okay my chin is parallel my shoulders are down so all the alignment of Tadasana comes here now from here I take my right leg to the 45 degree angle straighten my the left leg 45 degrees angles and the right leg to a large going forward now from here lift the back heel up now lifting the back heel up keep your hips square in front tall yourself now take the arms in Namaskar Mudra press the palms open the chest keep that back leg more active okay inhale exhale so what we need is Twist first okay so inhale exhale inhale exhale so place the elbow on the knee but keep the back leg active press it open the chest keep the knee ankle in one line check check check and breathe you can twist a little bit more up but it's fine to keep it in front breathe in and breathe out keep your back leg active inhale come up and that's the way you get into the first variation of going very slowly and gently now let us get into a second variation of from a downward facing dog so I be here downward facing dog I activate stretch give a nice warm up lengthen put the knees on the floor now from here I take okay let's try to the other side I did with the right so let's do it with the left also so I'm also balanced okay so hips are square tall yourself give nice stretch to your basically your cords and just lengthen it okay and just give a twist so add up your in the preparations don't forget to add the twist okay now from here once again in Namaskar mudra inhale exhale so I am giving a twist okay and exhale so inhale exhale inhale exhale now from here twist okay set the abdomen in engage the core now tuck your toes under lift up back leg active open the chest and breathe inhale and exhale inhale and exhale so we don't need loosening we need active in the back leg so activate it tall yourself heels are active arches are active of the back feet and breathe shoulders are down and put the knees on the floor gently and put your hands up now that was you can say a little bit of simple version now let's try the other one on so for here I use a block so I take a block now it depends so once again lunge position I tall myself now from here I lengthen the back leg activate it I need the back straight neck long now inhale exhale and now from here push this in lock it hold it there back leg active and from here you can take the arms back twist look in that position that's completely fine and maintain so you can take the arms here in twist that is you can put the arms here also for a little bit of easy you want to challenge yourself you can put the arms here and give a twist so before doing that don't forget to keep it the knees on the floor and try to give a twist and then later on you can lift the knees up so friends do it very slowly and steadily it's a deep detoxifying twist just go slowly use blocks you props whenever you wish now in the classical version the heel is on the floor so now let's focus on the classical version now what happens in the classical version if you remember the heel is aligned with the arches and that's your Parsvakonasana okay or the side angle pose or that's the pose fine depends upon person's flexibility but here in the classical version we always wanted the heel to be on the floor so now let's get into it now from here take it lift the arms up lengthen it take it down then Bend the knees straighten it and twist pull that back heel on the floor shoulders are down widen it out and maintain breathe come back now in this position the problem is friends I get a lot of strain on my knee and I am not comfortable with it so definitely I avoid doing that pose but yes if you are comfortable at the knee at the hip specially at the groin please go ahead and do the pose so you have three variations of getting into the moves friends this pose is great to strengthen and stretch your legs your groin it opens the chest and shoulders it also stimulates and tones the abdominal organs and lungs at the same time it improves your digestion elimination and metabolism also so friends you need to practice this pose although it's quite challenging it improves your balance memory and concentration and there are times you might fall just enjoy your fall friends because only when you fall you rise ok friends I am Ritesh here thank you for watching in case you like my video don't forget to hit the like button and yes do and you have any comments or suggestions please mention in the comment section below it's great that we can learn and share our knowledge understanding ok namaste :)
 Dandasana (Staff Pose or Base Pose) How to Do Step by Step for Beginners, Benefits and PrecautionsSiddhi Yoga International · 6:44
 Gomukhasana (Cow Face Pose) Benefits, How to Do & Contraindications by Yogi Sandeep - Siddhi YogaSiddhi Yoga International · 11:48
 Revolved Triangle Pose · Parivrtta Trikonasana TutorialYoga International · 5:31
 How to do Revolved Side Angle Pose · Parivrtta Parsvakonasana AKA Revolved Side Angle Pose · Yoga EdYoga with Stephanie · 3:51
 How to do Dancers Pose - Tutorial, Modifications and Exploring Standing Bow PoseDi Hickman · 8:40
 Intermediate Yoga: How to do Parivrtta Ardha Chandrasana · Revolved Half Moon PoseNutrizon Official · 4:04
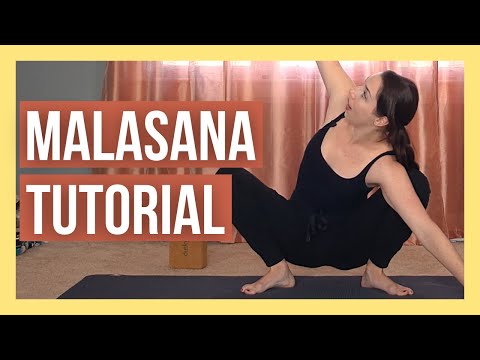 Malasana Yogi Squat Pose Tutorial - Tips & Tricks for BeginnersYoga with Kassandra · 12:08
 How To Do Revolved Triangle - Parivrtta TrikonasanaLydia Lim Yoga · 4:17
